
Jewellery Photography: Controlling Reflections, Positioning and Product Detail
A Behind the Shoot case study from Nikita Photography Studios
Project Overview
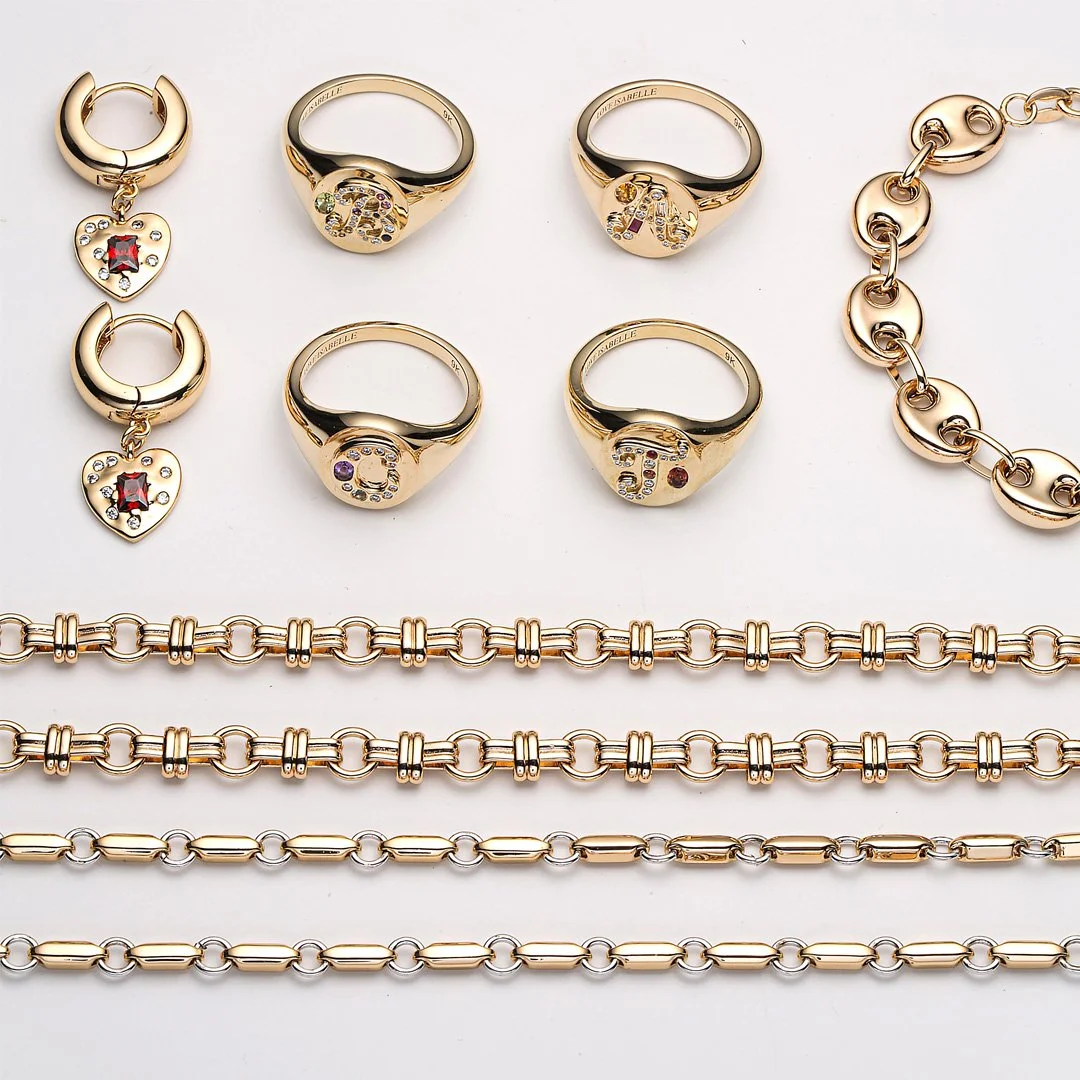
For this jewellery photography project, our Sydney studio received a collection comprising three necklaces, four rings, one pair of earrings and a bracelet.
The client required two photographs of each ring, with specific presentation requirements for certain designs. All final images needed to be supplied as PNG files with transparent backgrounds, without additional drop shadows, for use on the client's eCommerce website.
The collection required several different photographic approaches. The earrings needed precise positioning, the rings required carefully controlled reflections, the necklaces had to maintain consistent proportions and symmetry, and the bracelet was photographed using an overhead flat lay setup.
Each product required an individual approach to lighting and positioning while maintaining a consistent visual presentation across the collection.
The Photography Challenge
Jewellery photography is technically demanding because even relatively small pieces can contain several different reflective surfaces.
Polished metal reflects its surroundings, gemstones respond differently to changes in lighting, and intricate settings can create unwanted shadows or obscure important design details.
These challenges become more apparent when photographing jewellery at close range.
A reflection that might be barely noticeable to the naked eye can become prominent in a close-up photograph. Dust, fingerprints and minor surface imperfections can also be much more visible.
For this project, the main considerations included:
Controlling reflections across polished gold surfaces.
Maintaining sharp detail throughout each jewellery piece.
Positioning individual products accurately and consistently.
Creating the client's preferred presentation for the rings.
Preparing clean product images for transparent-background delivery.
The absence of added drop shadows also meant that the jewellery needed to retain its shape and definition through the lighting and natural tonal variations across the metal itself.
Preparing the Jewellery for Photography
Before photography begins, we carefully inspect and prepare each piece.
Throughout our jewellery photoshoots, we wear gloves when handling products to minimise fingerprints and avoid transferring skin oils onto polished surfaces.
This is particularly important when photographing gold and other highly reflective materials, where even small marks can become visible under studio lighting and macro photography.
We also organise the products according to the shooting sequence to minimise unnecessary changes to the lighting setup.
Our usual approach is to photograph earrings first, followed by rings, necklaces and finally bracelets.
For this project, we began with the earrings before progressing to the four rings and three necklaces.
Achieving Sharp Detail in Macro Photography
Jewellery photography frequently involves working at close distances, where depth of field becomes extremely shallow.
It is important to establish sufficient depth of field so that the essential details at the front and back of a piece remain in focus.
Using a smaller aperture, represented by a higher f-number, can increase the depth of field. However, the appropriate setting depends on the jewellery's dimensions, camera position, lighting and required image quality.
We assess the focus requirements for each piece individually rather than applying one camera setting to the entire collection.
The goal is to retain the fine details of the jewellery without sacrificing the clarity and definition of the finished image.
Photographing the Earrings: Positioning and Reflection Control
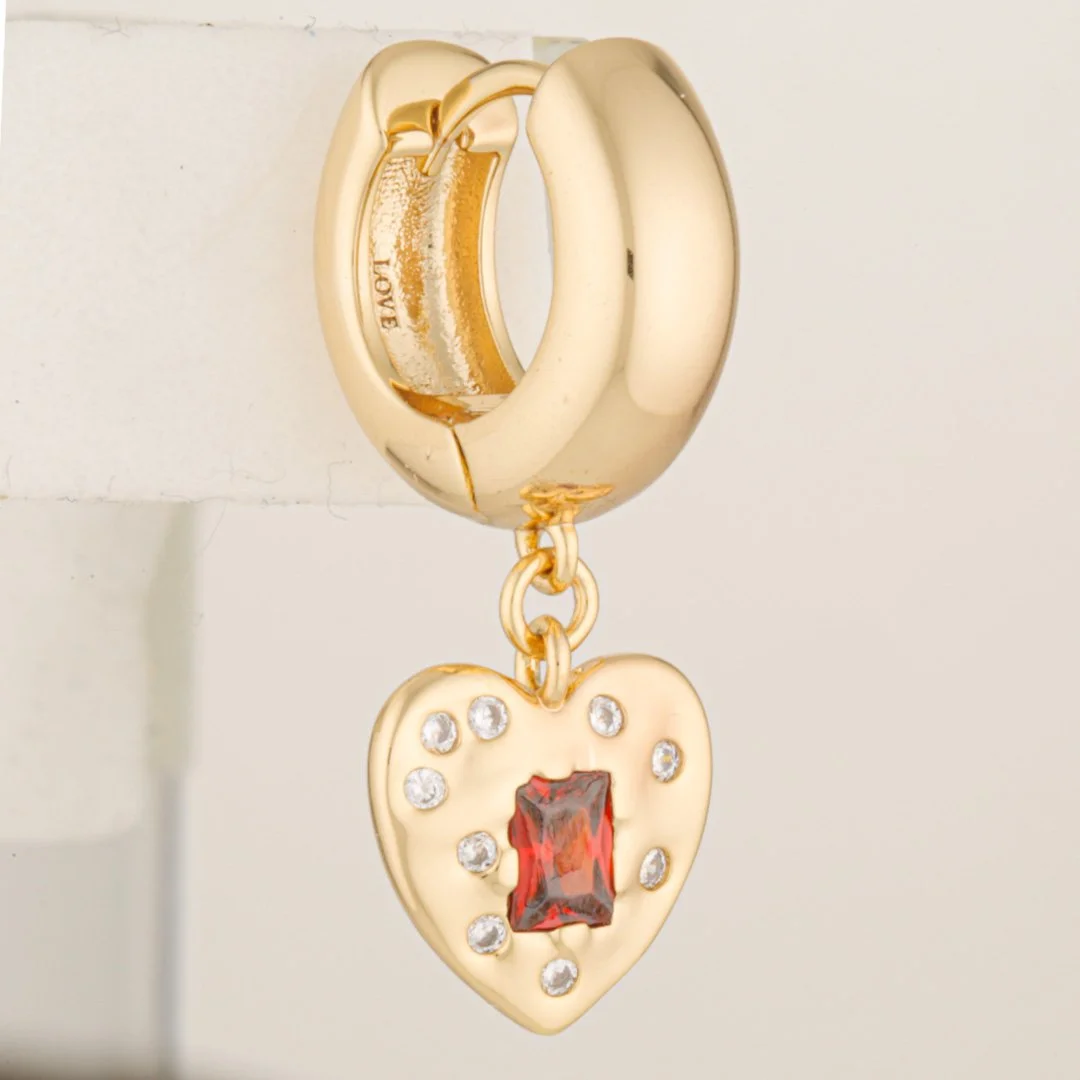
The earrings in this collection were identical, allowing us to photograph one earring and reproduce the matching piece during post-production.
This approach helps maintain a consistent presentation when the two earrings are intended to appear as a matching pair.
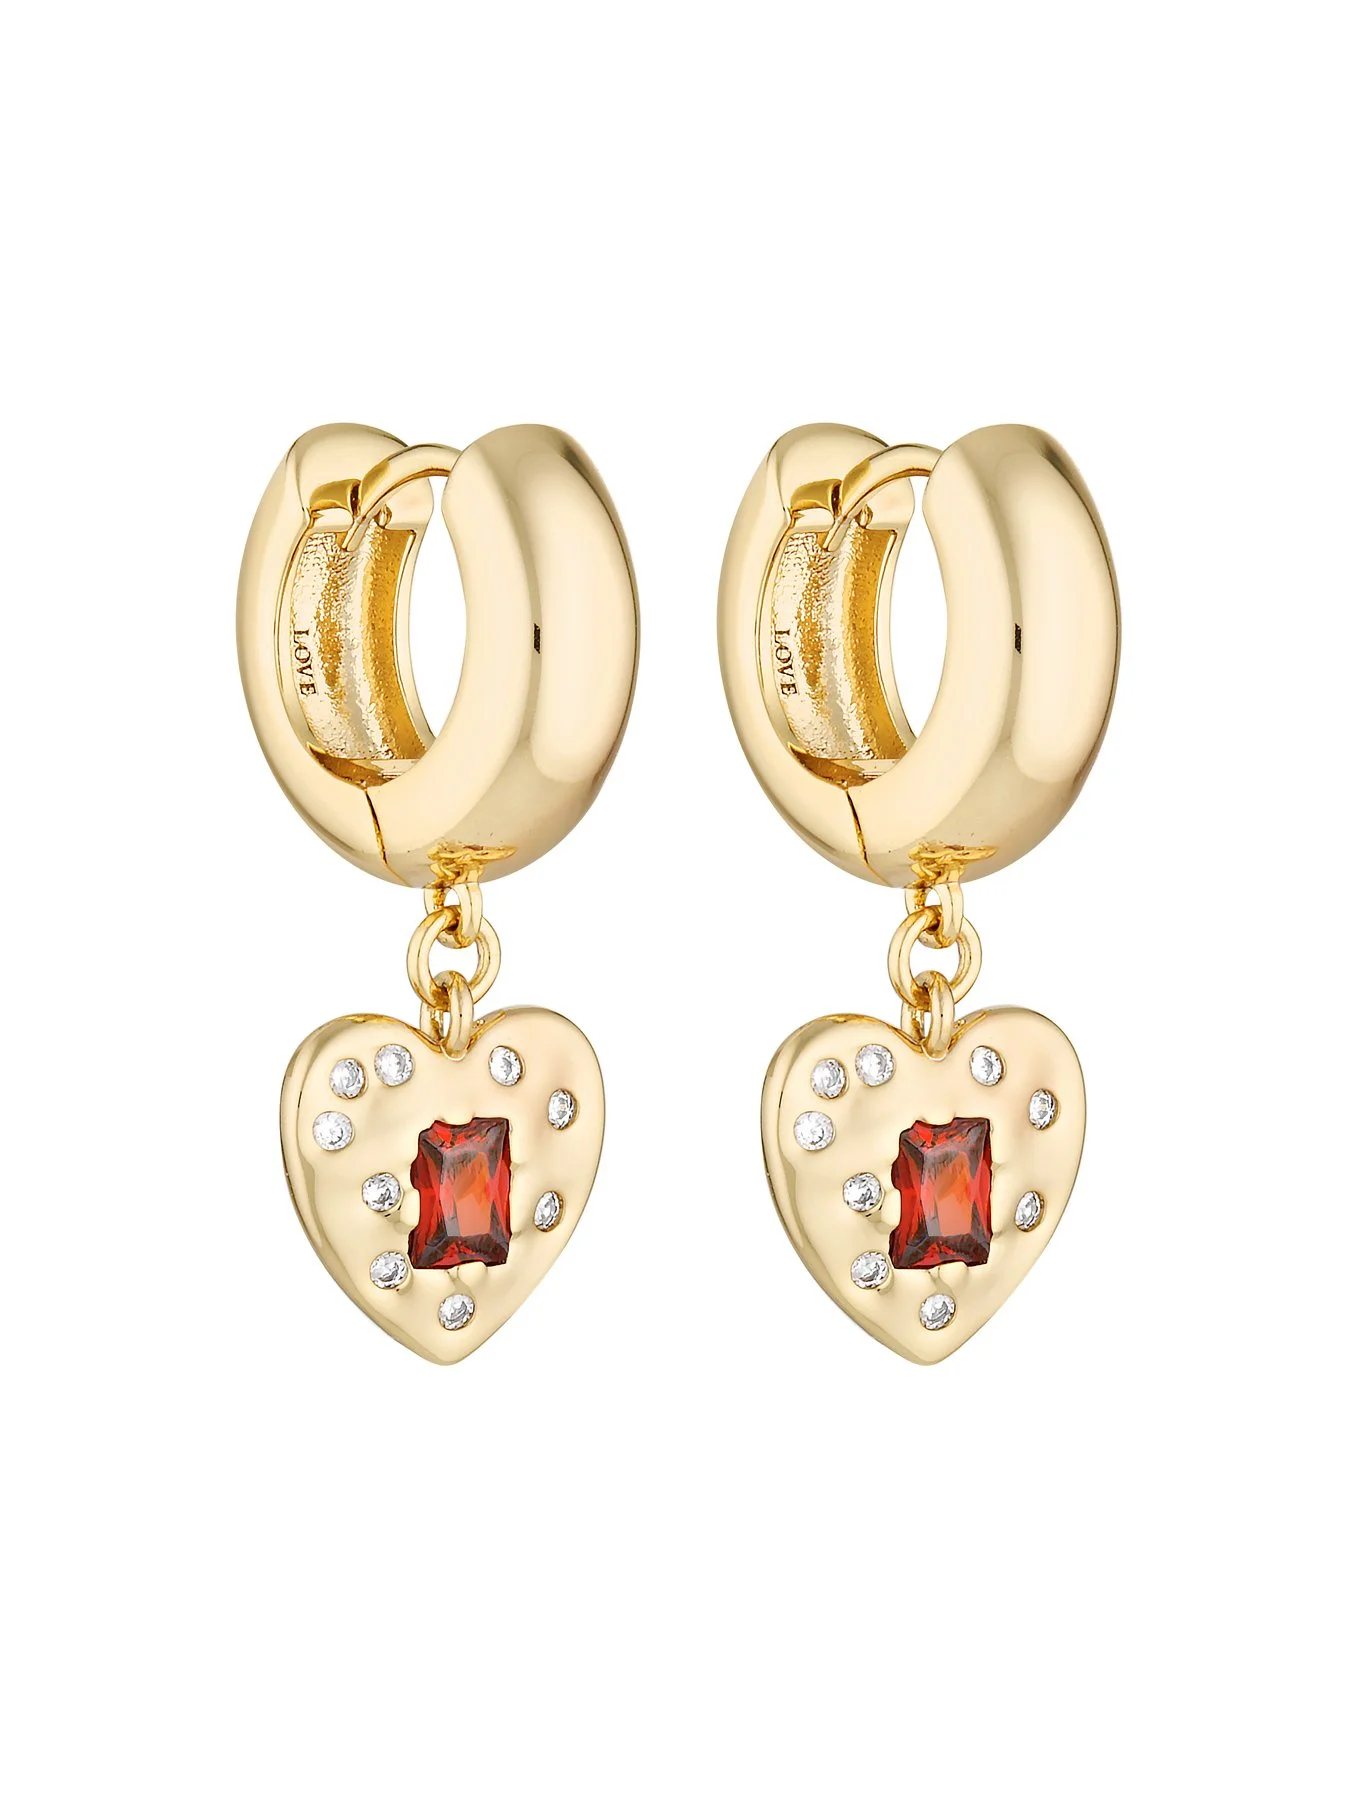
For this particular design, we selected a front three-quarter view, with the earring rotated approximately 45 degrees.
The camera was positioned straight towards the jewellery rather than looking down from above or upwards from below.
This allowed us to maintain the desired perspective while showing the shape of the hoop and the decorative pendant.
Establishing the Lighting
We used a three-light setup for the earrings, with the lights directed towards the jewellery.
One of the challenges when photographing polished metal is that the surface reflects everything around it, including the camera and darker areas of the studio.
To manage these reflections, we positioned a white board around the shooting area to control what appeared in the metal and reduce unwanted reflections of the camera lens.
This helped create a cleaner appearance across the gold surface while preserving the definition of the hoop and pendant.
Keeping the Earring in Position
The earring also needed to remain stable throughout photography.
We used double-sided tape to secure the piece in its required position.
The supporting material and temporary fixing elements can then be removed during post-production, leaving only the jewellery in the final image.
Once the photograph is prepared, the matching earring can be duplicated and positioned to create the pair required for the client's product listing.
This approach is suitable when the pieces are identical and the client requires a consistent product presentation.
Photographing the Rings: The Challenge of Flat Reflective Surfaces
The four rings required two photographs each.
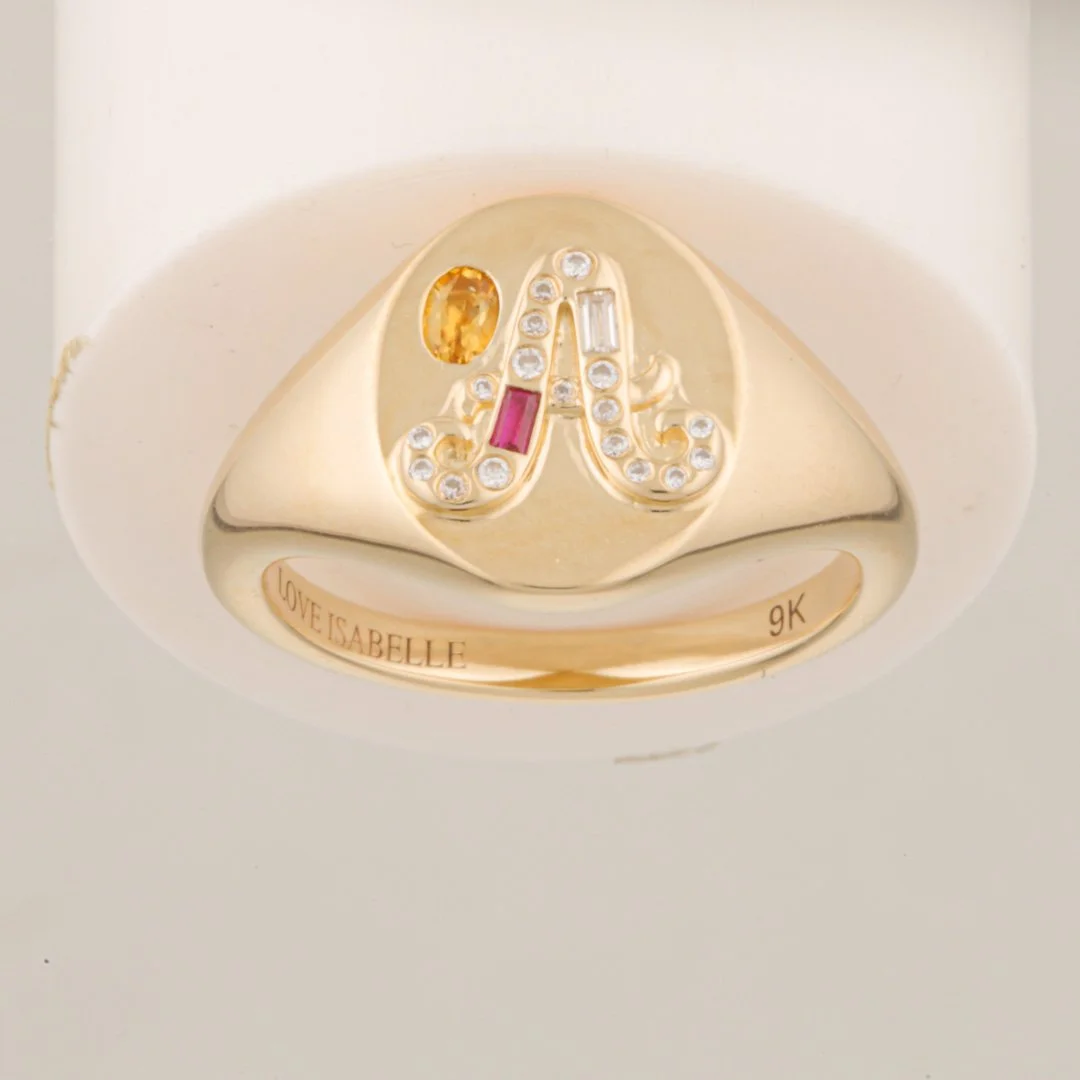
The client had a particular preference for how the rings should be presented. Rather than displaying the back of the ring towards the top of the image, they wanted it to appear towards the bottom.
To achieve this presentation, we photographed the rings upside down.
This orientation creates the impression that the ring is suspended in the air, with its decorative face becoming the primary point of attention.
Controlling Reflections on the Ring's Face
One of the most technically demanding aspects of this setup was photographing the flat, polished surface at the front of the ring.
Flat reflective surfaces can be particularly difficult to light because they reflect their surroundings directly.
Without appropriate reflection control, the surface may appear excessively bright, unnaturally dark or visually flat.
Our objective was to create a controlled tonal gradient across the metal, allowing the ring's shape and contours to remain visible.
We used white boards to modify the reflections appearing on the jewellery.
By adjusting the position and angle of the boards, we could influence the distribution of light across the polished surface.
This is an important distinction in jewellery photography: we are not simply illuminating the product. We are also controlling what the reflective surface sees.
The position of the white boards can have a significant effect on the appearance of the metal, even when the jewellery and camera remain in the same position.
Creating the Second Ring Angle
For the second photograph of each ring, we repositioned the lights higher.
This concentrated more light towards the upper section of the jewellery rather than primarily illuminating the sides.
The change helped establish a different distribution of highlights and reflections for the alternative viewing angle.
Each ring required careful positioning and reflection control to ensure that both photographs represented the same product accurately.
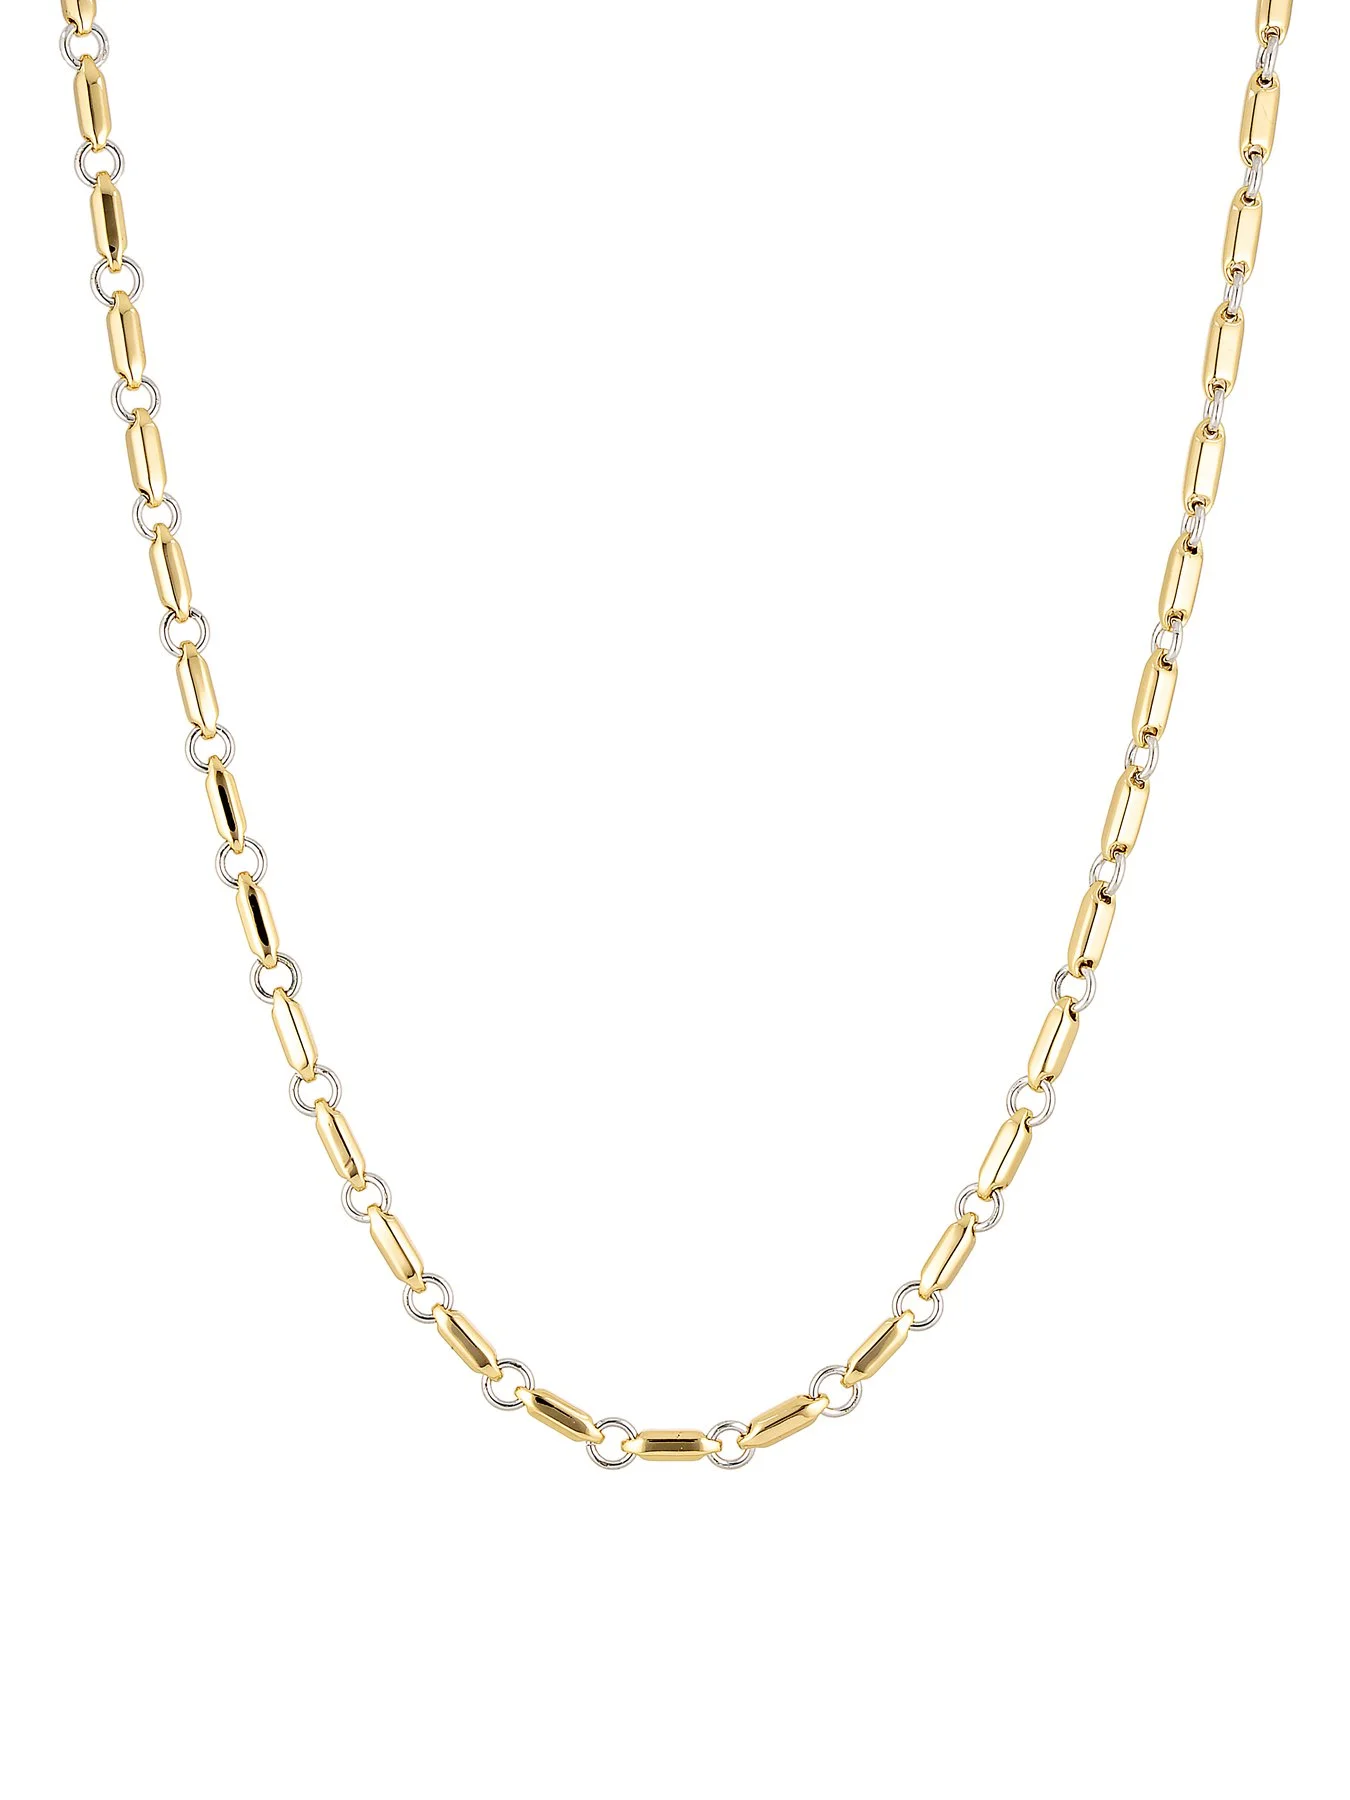
Photographing the Necklaces: Shape, Symmetry and Link Positioning
For the three necklaces, we used our hanging photography setup.
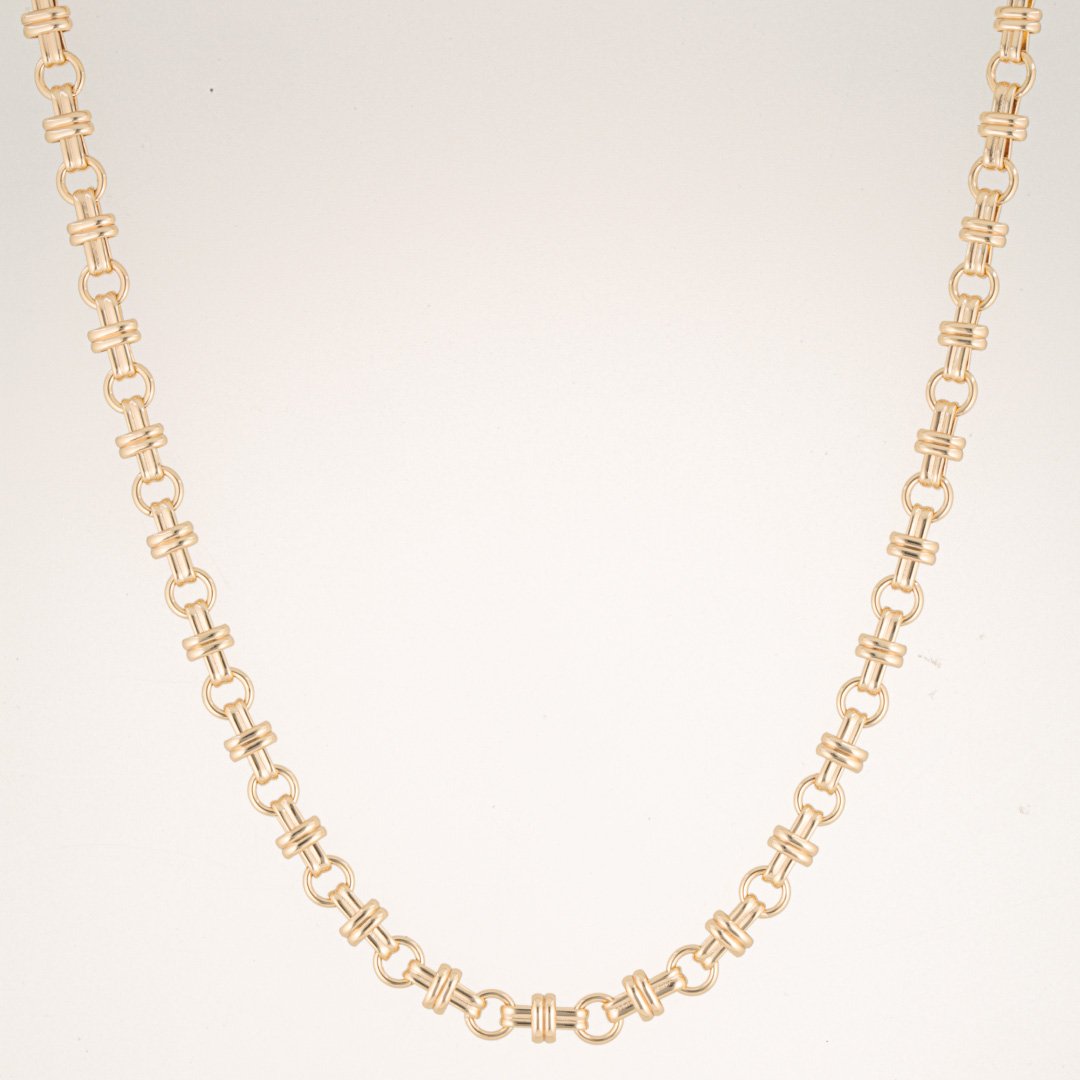
Unlike flat lay photography, where the necklace rests on a horizontal surface, this setup allows the chain to hang naturally while we control its overall shape.
The opening at the top is arranged to approximate the proportions of a typical neckline, helping the necklace appear as it would when worn.
This is particularly useful for eCommerce photography because it gives customers a clearer understanding of the jewellery's shape and how the chain is intended to sit.
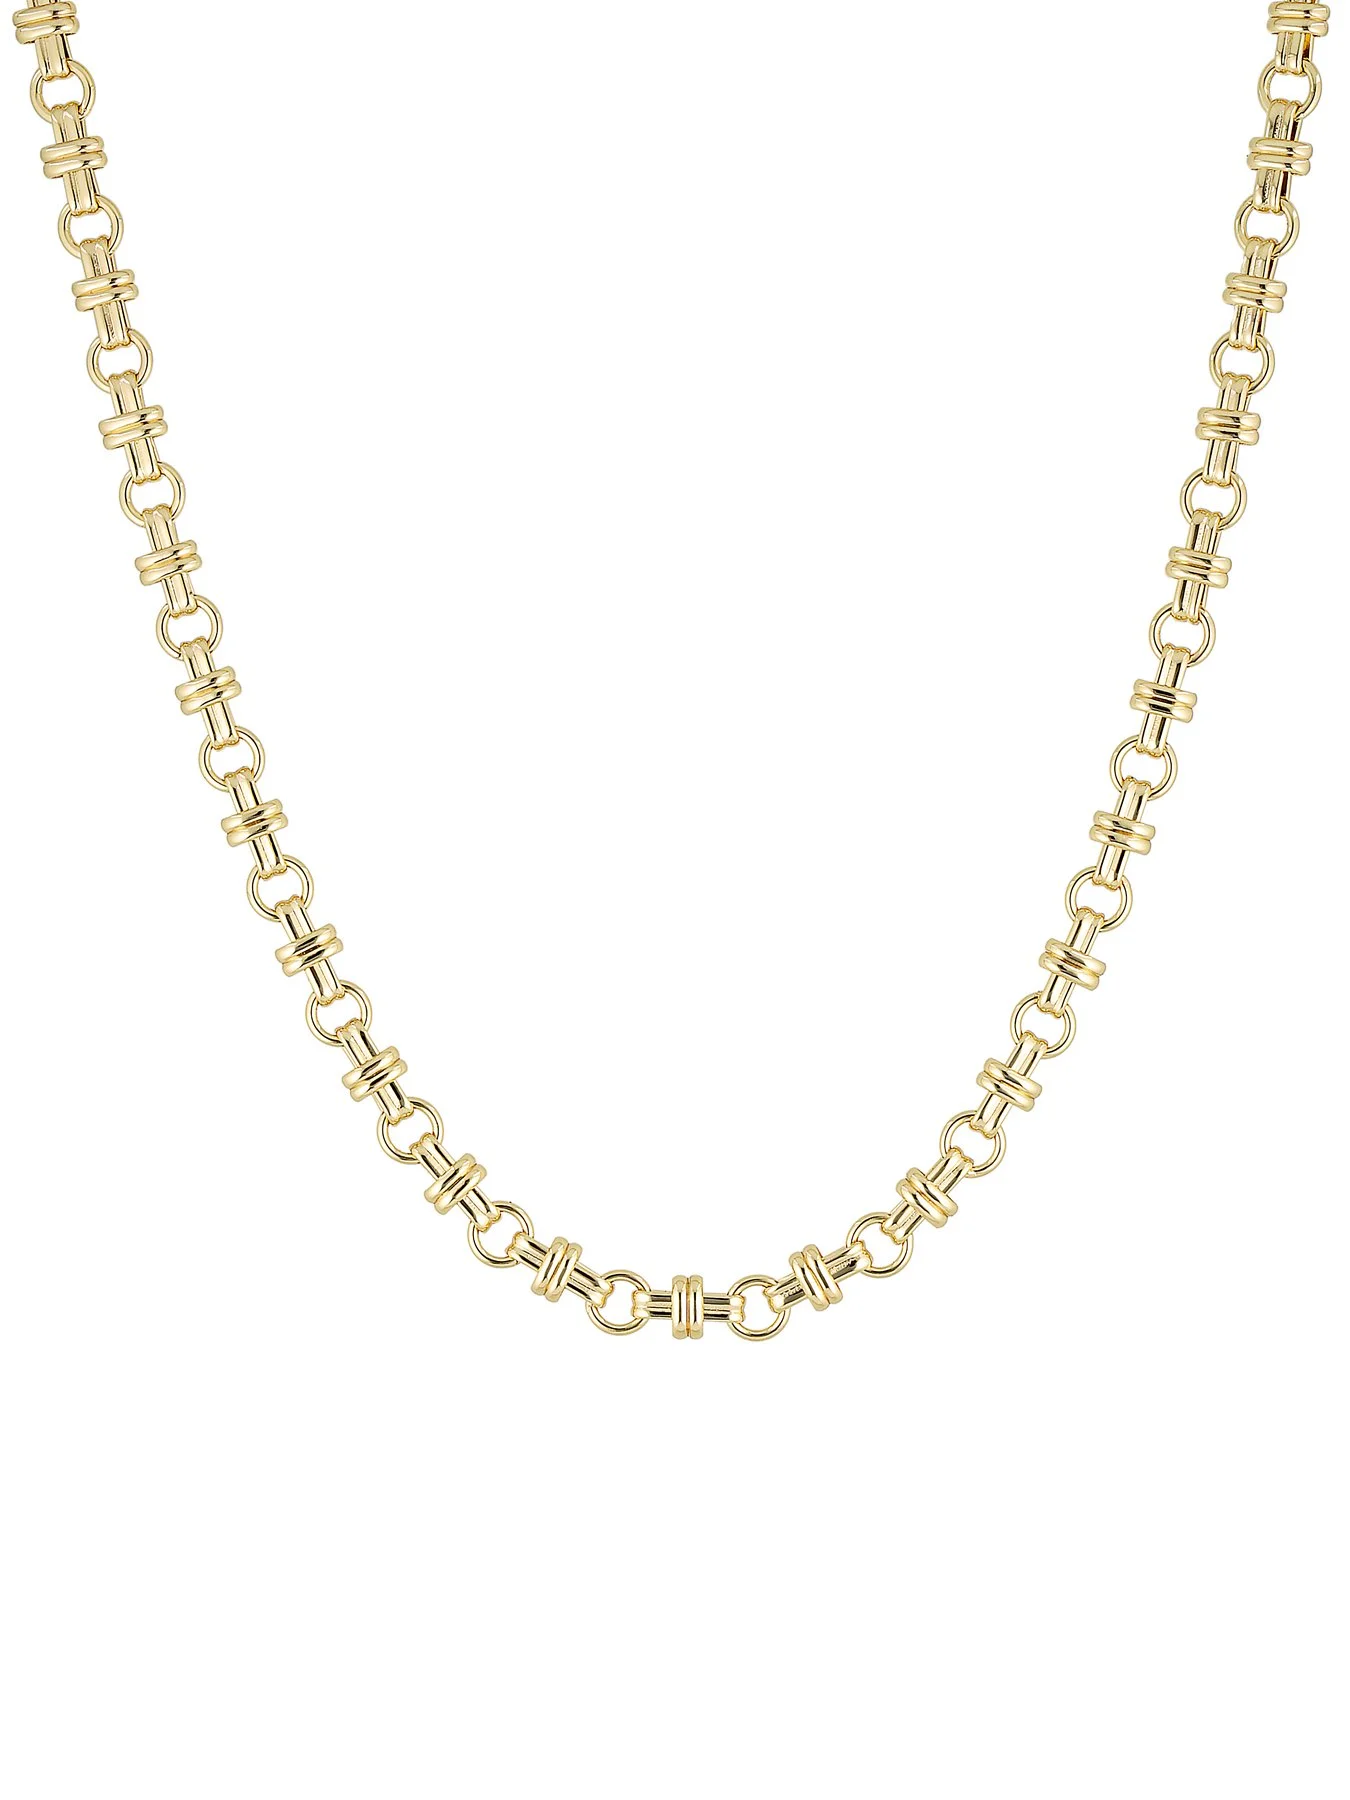
Creating a Consistent Necklace Shape
One of our priorities is maintaining symmetry between the left and right sides of the necklace.
The chain must be positioned carefully so that the lowest point sits centrally and the overall shape remains consistent.
For linked necklaces, we also aim to position an individual link at the centre whenever the construction of the chain allows it.
This may appear to be a minor detail, but it can make a noticeable difference to the visual balance of the finished photograph.
An off-centre link or uneven chain can make the product appear incorrectly positioned, even when the jewellery itself is symmetrical.
We therefore spend time arranging the chain before photography rather than relying entirely on post-production to correct its shape.
The hanging setup also helps us maintain consistent proportions when photographing several necklaces for the same collection.
Photographing the Bracelet: Overhead Flat Lay Photography
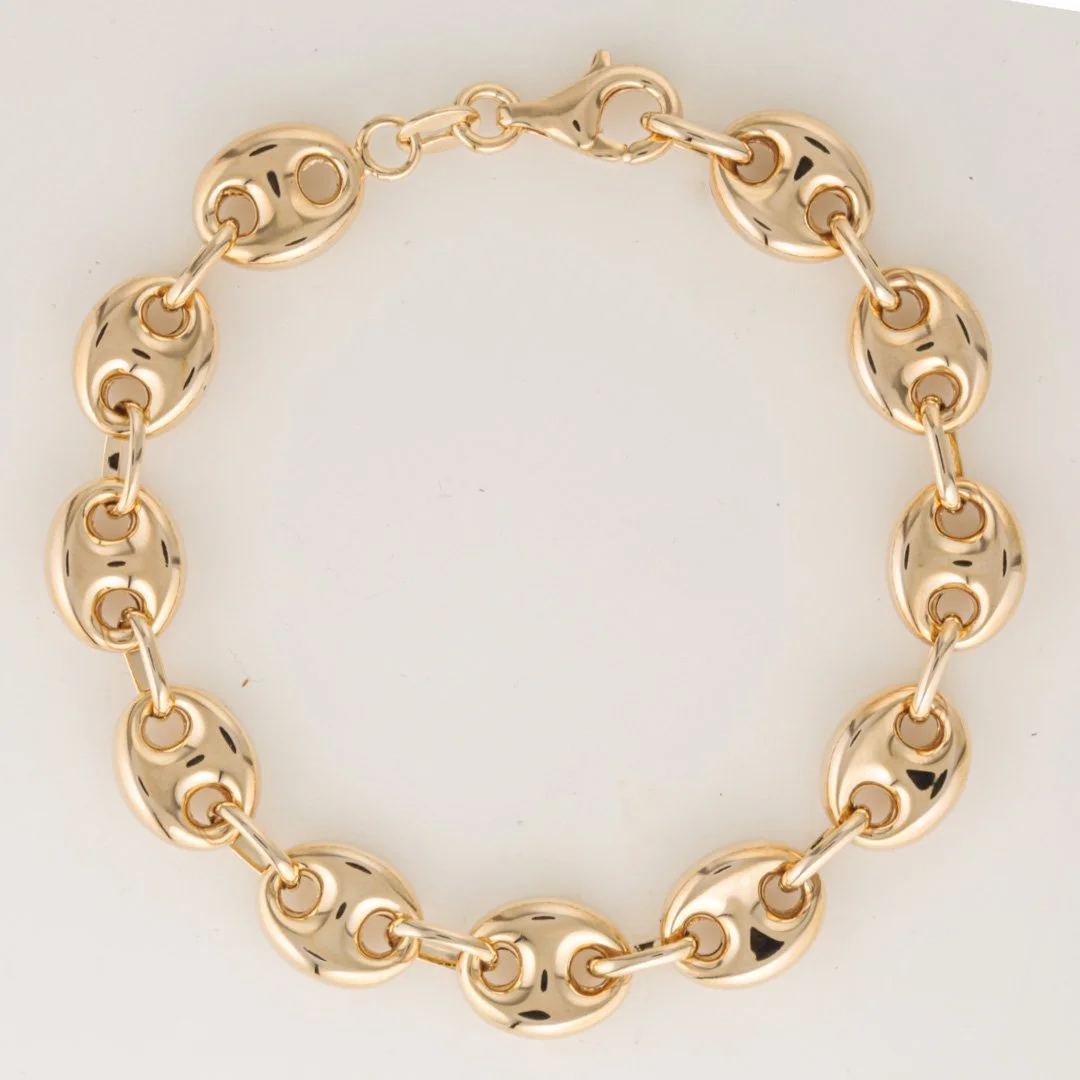
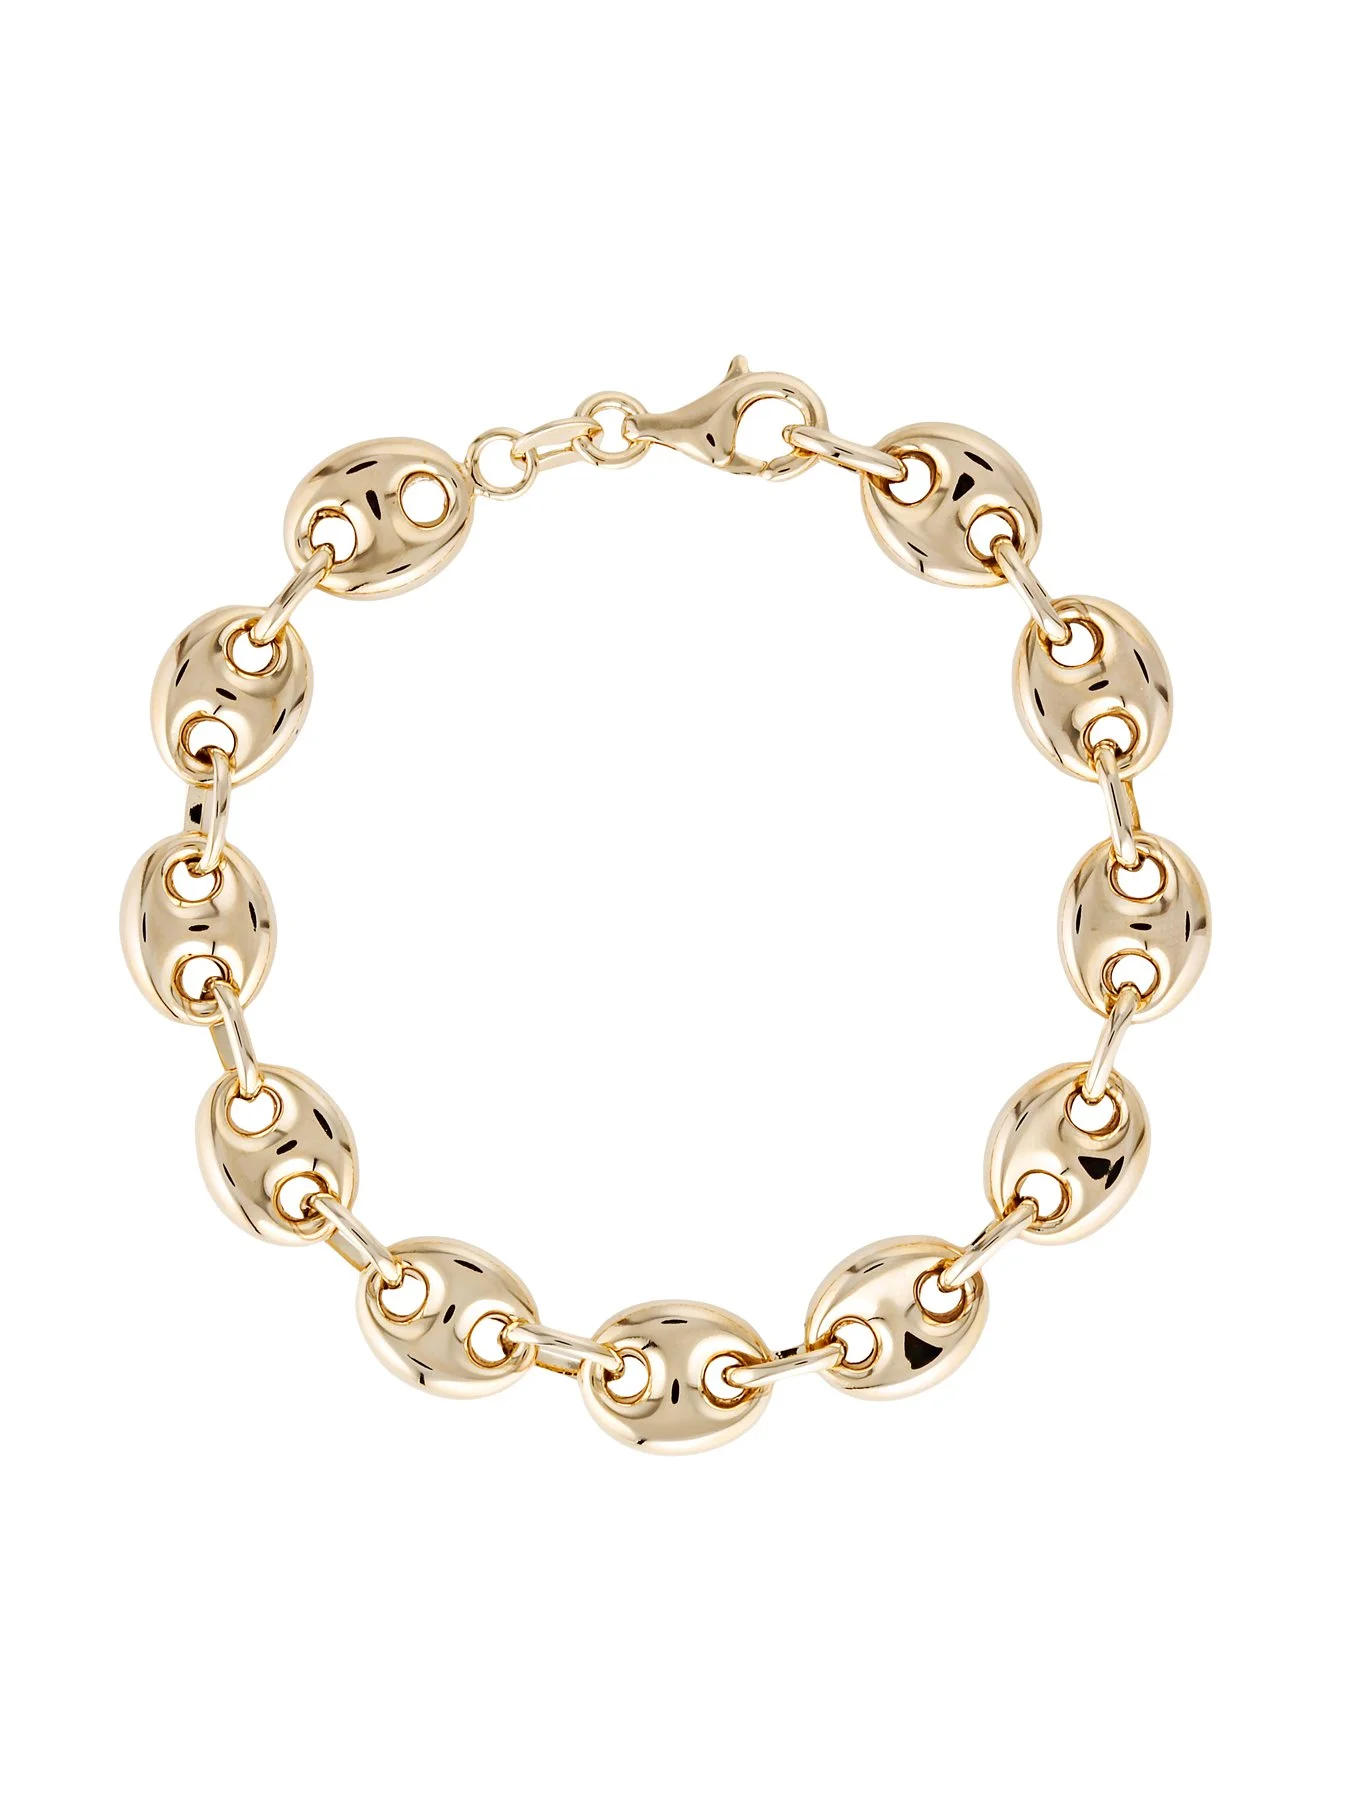
For the bracelet, we used our flat lay photography setup, positioning the camera directly above the jewellery.
Unlike the hanging technique used for necklaces, flat lay photography allows us to arrange the bracelet on a horizontal surface and control its overall shape.
Our preferred presentation is a circular arrangement, with the clasp positioned towards the left.
This orientation creates a consistent visual reference for bracelet photography while keeping the clasp and individual links visible.
The arrangement of the links is particularly important. Because the bracelet is constructed from interconnected polished metal elements, its overall appearance depends on how naturally the links sit in relation to one another.
The objective is to maintain the bracelet's natural proportions, preserve its circular shape and clearly communicate the construction of the jewellery.
As with the other pieces in the collection, reflection control remains an important consideration when photographing its polished gold surfaces.
Post-Production: Preparing Jewellery for Transparent Backgrounds
Once the photography is complete, the images move through our post-production workflow.
Each photograph requires background removal, also known as deep etching, to separate the jewellery from its original studio environment.
This stage is particularly detailed for jewellery because chains, clasps, gemstone settings and small connecting elements can create complex edges.
Our retouching team works carefully around these areas to preserve the natural construction of each piece.
The images are then refined to address visible dust, fingerprints and minor imperfections while retaining the jewellery's original design and material characteristics.
Creating a Consistent Product Presentation
For the earrings, the photographed piece is prepared and duplicated to create the matching pair.
For the rings, the two required angles are processed with attention to colour, reflections and product positioning.
The necklaces are reviewed for symmetry, chain alignment and consistent proportions.
Because the client requires transparent PNG files without additional drop shadows, the final images must also be carefully checked for unwanted background remnants and irregular edges.
Colour correction is applied to maintain a consistent appearance across the collection while preserving the intended colour and finish of the jewellery.
The completed images are then reviewed before final export.
The Final Images
The final gallery presents the completed jewellery images, including the earrings, two ring angles, necklaces and bracelet.
The photographs demonstrate how different positioning and lighting techniques were applied across the collection, from the three-quarter earring presentation and suspended ring photography to the hanging necklace setup and overhead bracelet photography.
All images were prepared according to the client's eCommerce requirements, with transparent backgrounds, no additional drop shadows and a consistent visual presentation across the product range.




What This Project Demonstrates
Jewellery photography is not simply about making polished metal appear bright.
The appearance of each piece depends on a combination of camera position, lighting, reflection control and product preparation.
Small adjustments to a white board can change how a gold surface appears. Repositioning a necklace link can improve the symmetry of the entire image. Changing the height of the lighting can alter the way a ring's shape is defined.
Even the choice between hanging and flat lay photography makes a difference. Necklaces benefit from a natural suspended presentation, while bracelets can be arranged and photographed from directly above to demonstrate their shape and construction.
These decisions are made during the photoshoot, before the images reach the retouching team.
Post-production plays an important role in refining the photographs, but accurate positioning and controlled lighting remain essential to producing natural-looking jewellery images.
This project demonstrates how different photographic techniques can be combined to create a consistent collection of professional eCommerce jewellery photographs.
Professional Jewellery Photography at Nikita Photography Studios
Nikita Photography Studios provides professional jewellery photography for Australian brands, designers and retailers.
Our Sydney studio photographs rings, earrings, necklaces, bracelets and other jewellery, with specialist lighting, careful product positioning and detailed post-production.
From clean eCommerce images with transparent backgrounds to more complex jewellery photography requirements, each project is approached according to the design and intended use of the product.
Explore our Jewellery Photography service to learn more about our process, view examples of our work and request a quotation.